Snow Day? Really? I felt like I was 8 years old again. When I got the call that I didn’t have work last Wednesday, I was literally giddy with excitement and anticipation for the day of baking that lie before me. But what oh what to bake?
Thanks to Fresh and Foodie and Smitten Kitchen I settled on vanilla marshmallows, because is there anything better than a cup of hot cocoa after shoveling snow or making snow angels? No…there isn’t.
Home-made marshmallows are a BAH-ZILLION times better than store bought, so if you haven’t ever tried them, you MUST!
Springy, Fluffy Vanilla Bean Marshmallows
The recipe makes about 100 marshmallows, depending on how large you cut the marshmallows (I cut mine into rectangles.)
Ingredients
About 1 cup confectioners’ sugar
3 1/2 envelopes unflavored gelatin
1 cup cold water, divided
2 cups granulated sugar
1/2 cup light corn syrup
1/4 teaspoon salt
2 large egg whites
3/4 teaspoon vanilla extract
Steps:
- Oil bottom and sides of a 13″ x 9″ x 2″ rectangular metal baking pan and dust bottom and sides with some confectioners’ sugar. I like PAM (so easy) and make sure that you dust the pan very well (so important).
- In a large heatproof bowl, sprinkle gelatin over 1/2 cup cold cold water, and let stand to soften. (Beware: plain gelatin smells kind of gross as it softens.)
- In a 3-quart heavy saucepan cook granulated sugar, corn syrup, second 1/2 cup of cold water, and salt over low heat, stirring until sugar is dissolved. Increase heat to moderate and boil mixture, without stirring, until a candy or digital thermometer registers 240°F, about 12 minutes. (Just like Fresh and Foodie, I don’t have a candy thermometer. 12 minutes was the right amount of time for me as well. Carefully watch the pan to make sure that it doesn’t boil over.) Remove pan from heat and pour sugar mixture over gelatin mixture, stirring until gelatin is dissolved.
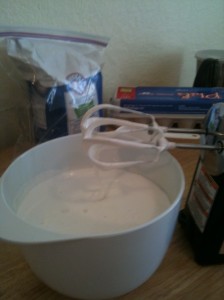
- With a mixer (hand-held or stand) beat mixture on high speed until white, thick, and nearly tripled in volume, about 8 to 10 minutes. (If you’re using a stand mixer, this will take less time — approximately 6 minutes.) (It will start to look like marshmallow fluff.)
- In separate medium bowl, beat egg whites until they just hold stiff peaks. (I did this while waiting for the candy mixture to cook. You will need to use separate beaters (or wash the originals) from earlier. If you chose to beat the egg whites while the candy mixture is cooking, make sure to briefly re-beat it before mixing it with the candy/sugar mixture.) Beat whites and vanilla bean into sugar mixture until just combined.

- Pour mixture into baking pan and sift 1/4 cup confectioners sugar evenly over top. The marshmallows should be entirely covered (It looks like SNOW!) Let marshmallows rest uncovered at room temperature for at least three hours before cutting.
 Run a thin, sharp knife around the pan, loosening the marshmallow. Carefully invert the pan over a cutting board, and using your fingers, start to pull the marshmallow away from the corner of the pan. Work your way across until the entire marshmallow is released from the pan and is on the cutting board. (Beware: this is a messing process!)
- Sift more powdered sugar on top of the marshmallows before cutting. Using a greased pizza wheel (or a long knife), cut marshmallow into 1-inch cubes or so. (I opted for 1.5 inch strips.) Return cut marshmallows to the pan and toss with an additional sifted confectioner’s sugar until well coated. Store marshmallows in a sealed container for up to one week.
- Enjoy with a yummy mug of hot cocoa (some milk with basic ganache or this recipe from Martha Stewart).

Pingback: More Macarons – Girl Scout Remix | Inconsequential Musings
See? That wasn’t so bad! Sounds like a great use of a snow day, if you ask me!